The microscope is a precious piece of equipment that requires proper maintenance. Often, the human eye is unable to see the smallest features of objects. A magnifying glass can be used to make these items more visible to the human eye. A microscope looks at various stained and unstained preparations of bacteria, fungi, parasites, viruses, and host cells. Taking proper care of a microscope is important because of its delicate nature. Initially, get a cleaning kit that you may need in the whole process or servicing or cleaning a microscope.
General Tips for the Maintenance of the Microscope
- Use a strong level table to place the microscope. There should be no vibration-producing equipment or instruments on or near this table. The table’s height must be comfortable for the user. As an alternative, adjustable stools should be made accessible to make microscopy more comfortable.
- Keep the microscope away from water, sinks, and chemical racks to avoid damage from splashes or spills.
- Use lens tissue or a piece of clean cloth to wipe the microscope’s body to drop any dust before using it.
- When the microscope is not in use, always unplug it.

Increasing the Lifespan of Microscope
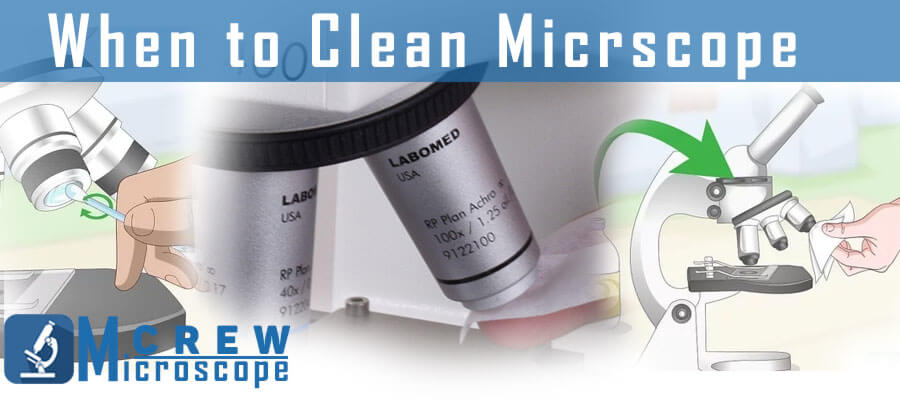
Regular maintenance is recommended to get the most of a microscope’s lifespan and precision. It’s always a good idea to get classroom microscopes and electronic lab microscopes serviced by a trained specialist. It is recommended that School Science or Lab Technicians should also clean the microscopes regularly.
Simple and Easy Steps for Cleaning the Microscope
- A sheet of paper should be laid out near the microscope wherever you intend to conduct research or experimentation.
- Disconnect the instrument’s eyepiece and place it on the sheet/paper.
- To be able to remove the eyepieces from the microscope, you’ll need an instrument Allen key or screwdriver. Some eyepieces can simply be taken out of the body of the microscope tube, while others must be unscrewed by hand.
- Check to see that the entire eyepiece (two lenses) is removed; the microscope tube should be clean for at least the bottom of a finger.
- Take out the devices/objects and write them down on a piece of paper to remember how to fit them back. It is always recommended to read microscope’s user manual before doing so.
- To prevent the aim from falling, unscrew it with both hands. To begin, loosen the locking grub screw on some devices. A small length of the rubbery tube can be put over some thinner sights (without machined collars) to make them easier to hold.

Cleaning of Lenses
Scratching and persistent immersion in water can degrade optical glass’s surface. Alcohol and other organic solvents can damage the mountants that hold the lenses in condensers and objectives.
Steps for Cleaning Microscope Lenses
- Use a soft brush or a lens tissue dipped in distilled water to clean the lens. When water fails to remove contaminants, organic solvents can use to clean the optics.
- Wet the Lens tissue with dimethyl benzene (xylene) or ethanol to clean the surface.
How to Clean Mechanical Parts of Microscope
- There is no need to mess if the oil on the lens and fine focus motor are soft and clean. The best way to clean filthy or lumpy grease is to use an oily rag wet with a small amount of light oil. Try using a cocktail stick. Avoid attempting to take off all the greases to get the rag within tight spaces.
- Disinfect the focusing-coarse mechanism with a grease remover for dirt or grease. Avoid using solvents such as acetone (propanol), carbon tetrachloride (CTC), or gasoline in schools because it is not safe. A short, rigid/hard brush may be helpful in this situation.
- Wipe down the nosepiece with a towel soaked in grease solvent.
- It’s best to clean the outer parts such as the body tube and the stage with soap foamy water or spray cleaners. Cleaners for tough stains or rust can be used, but be careful not to over-water the components.
Inspection of Microscope after Servicing
- Once the system is clean and reassembled, it’s time to make sure it’s working fine.
- Microscope slides with well-stained sections of a few millimeters in width should be selected. Activate it on stage. There should be no wiggle room between the clips and the stage. Use the clips bent by hand with pliers to make adjustments if necessary.
- Choose the eyepiece above the largest field of vision and the lowest-power aim (so that as much as possible of the object can be seen at once).

Focus your attention on the slide using the following method.
- Using the side view, lower the stage until it reaches its lowest point
- Use the coarse focus on the microscope to bring the picture into sharp focus. Retry the first step and/or examine the reassembly of stops and fine-focus mechanism if this isn’t the problem
- The fine-focus mechanism should cause a total movement between one and two millimeters when seen from the side. Often, there is a sign that moves between two fixed ones.
- It’s best to set an adjustable stop to stop the coarse focusing from moving farther when the fine focus is mid-range and you’ve got an image in focus.
- Rotate the eyepieces while gazing at the focused image to ensure they are clean. Rotating dark spots or flecks say a problem with the eyepiece. Also, check the focusing stop setting, it should be possible to focus the image using only the fine control with the coarse control against the stop to get the desired focus.
- Make sure that the microscope is still par-focal, meaning that when you move from one goal to the next, the images are all quite close to each other. If the parfocality of the microscope has been lost, make sure the objectives are the correct ones for the model being serviced.
- Condenser inspection is the final step. The low-power objective with the condenser as high as feasible and diaphragm open wide is the best method for focusing the microscope. Take off the eyepiece and see if the bottom of the tube fills with a disc of light that covers the entire field of view. If this is not an option, inspect the condenser’s alignment and cleanliness.
- Changing the eyepiece and lowering the condenser to see whether it improves the image or not. A smaller diaphragm aperture may help increase contrast even further.
- You can find microscope slide cleaning method here.
Easy to do Guide to Increase Durability of Microscope
Take care when handling: Microscopes can become misaligned if they are carried by the stage or eyepiece holder rather than the base and support arm.
Make sure you’re Protected: Make sure to cover the microscope every time you use or clean it to keep dust and other pollutants out of the device. A large plastic bag can use as a substitute for a cover in case you cannot locate your original one.
Keep everything in its proper place: Be sure to keep the microscope out of direct sunlight and in an area that isn’t prone to be bumped or damp. Make sure the microscope is level with the table/bench before using it.
Keep the space free of trash and debris: Make sure that the place is tidy and ready for the next person to use, even if that person is you: The counter should be clean, the bottles covered, and the essentials within easy reach of the user.
Daily Cleaning: Lens paper can be used to remove dust and other particles from the stage, and a little alcohol can be used to remove oil and other contaminants. Regularly clean with a soft brush or canned air but take caution.
Keep the Lenses Clear: Each time you use the oil immersion lenses, wipe them using lens paper.
Follow the instructions to perform any removal procedure in the Lab
Only use lens wipes/lens paper for cleaning lenses. A tissue, paper towel, or another sort of wipe will scratch the lens.
When cleaning the ocular lens in the eyepiece, be in mind that eyelashes, cosmetics, and fingers can all get on it. Hire a professional to clean the objective lenses or follow the given instructions.
Care for Bulbs
Turn off the microscope when you’re done with it. As a precaution, do not leave the light on all day.
At the very least, keep at least two spare bulbs on hand. A blown bulb isn’t ideal when you’re looking at crucial cells via a microscope, so you don’t want to risk using a new bulb that isn’t up to the job. It’s possible, and I’ve seen it firsthand.
Refer to the User Guide
Keep the microscope’s manual close at hand by hanging it on the wall or putting it in a drawer. You’ll want to keep the light bulb ordering number and the phone number for a microscope technician accessible.
New users should study the manual at least once or can follow the guide here.
Maintaining your Microscope
A yearly inspection of the microscope is recommended by a certified repairing lab. Consider hiring a professional to maintain your microscopes — they will inspect all lenses and moving parts.
If you take care of your microscope, it will last a long time. Do keep in mind, however, that each type of microscope has its own idiosyncrasies, so be sure to read the manufacturer‘s manual and take notice of specific suggestions before using the microscope. Take good care of your pricey microscope, and it will take good care of you!
Leave a Reply